In this Tutorial i ll explain how to install Exchange server 2013 Step by Step with Active Directory Domain Controller 2012R2 server.
My Lab is in NAT mode on VMware Workstation.
- Exchange Server Hostname : WIN2k12MAIL
- ADDC : WIN2K12DC
IP Address are follows

ADDC
IP 192.168.200.10
GW: 192.168.200.2 ( NAT GATEWAY)
DNS: 192.168.200.10, 192.168.200.2
Exchange
IP 192.168.200.20
GW: 192.168.200.2 ( NAT GATEWAY)
DNS: 192.168.200.10, 192.168.200.2
Make sure to have the latest updates on both the servers
Install and configure AD on the WIN2K12DC and Join the Mail server as a member. Once its joined it will ask to restart the server , Restart it. Once its boot up you need to login to mail server as DOMAIN Administrator ( Domain name \ Administrator,) in my case i ll use student\Administrator. My domain name is Student.edu.au.
Make sure the Firewall is properly configured for testing I have disabled the firewall.
On the DC we have to create the following under DNS.
Go to DNS manager and add the following records.
Create a CNAME to point the WIN2K12MAIL as MAIL
create a MX record to point WIN2K12MAIL.
Once its done go back to your mail server and do a ping to DOMAIN name like Ping student.edu.au, this should response with the DC's IP address then go back to the Exchange ( mail server) and do a NSLOOKUP to mail.student.edu.au, this should reply your mail server's IP address. If not check your DNS configurations.
Once all of this done. we will move to mail server to install the exchange server 2013.
Exchange server 2013 needs few prerequisites to be installed before it starts.
Prerequisites
1)Download and install Microsoft Unified Communications Managed API 4.0, Core Runtime 64-bit in Mail Server
2)Download and install Microsoft Office 2010 Filter Pack 64 bit in Mail Server
3)Download and install Microsoft Office 2010 Filter Pack SP1 64 bit in Mail Server.
4)Install .NET Framework 3.5 in Mail Server. In most cases, this feature is installed by default if not install using power shell
You must mount the Windows server 2012R2 image to run this command
Install-WindowsFeature NET-Framework-Core -Source D:\sources\sxs
5) Run the following command in Windows Power Shell to install other required components.
Install-WindowsFeature RSAT-ADDS-Tools, AS-HTTP-Activation, Desktop-Experience, NET-Framework-45-Features, RPC-over-HTTP-proxy, RSAT-Clustering, RSAT-Clustering-CmdInterface, RSAT-Clustering-Mgmt, RSAT-Clustering-PowerShell, Web-Mgmt-Console, WAS-Process-Model, Web-Asp-Net45, Web-Basic-Auth, Web-Client-Auth, Web-Digest-Auth, Web-Dir-Browsing, Web-Dyn-Compression, Web-Http-Errors, Web-Http-Logging, Web-Http-Redirect, Web-Http-Tracing, Web-ISAPI-Ext, Web-ISAPI-Filter, Web-Lgcy-Mgmt-Console, Web-Metabase, Web-Mgmt-Console, Web-Mgmt-Service, Web-Net-Ext45, Web-Request-Monitor, Web-Server, Web-Stat-Compression, Web-Static-Content, Web-Windows-Auth, Web-WMI, Windows-Identity-Foundation
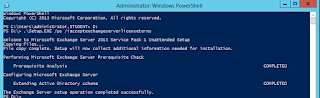
6) Prepare the schema by using the following command
Mount the Exchange 2013 and type the command
PS C:\Users\administrator.STUDENT> D:PS D:\> .\Setup.EXE /PS /IAcceptExchangeServerLicenseTerms

Done:

1) Domain Controller's IP configuration

2) Exchange Server IP Configuration

3) Join the Exchange to Domain

4) Login , Click Other Users

5)Login as Domain Admin

6) Install Dependencies

7) Install windows Features as mentioned Above

8) Restart the server

9) Install .net 3.5 ( I am using power shell commends ) , Mount the Windows server 2012R2

10) Run the power shell command
Done:

11) Once its done install Exchange server 2012 using setup.exe file.

12) Double Click on the DVD Drive.

13) Continue the installation upto this point

14) Make sure to tick all the options, Click next and wait till the next screen comes
15) Give any name relevant to your Organization , Doesn't need to be your domain name

16) Make sure to enable Malware scanning and Click next.
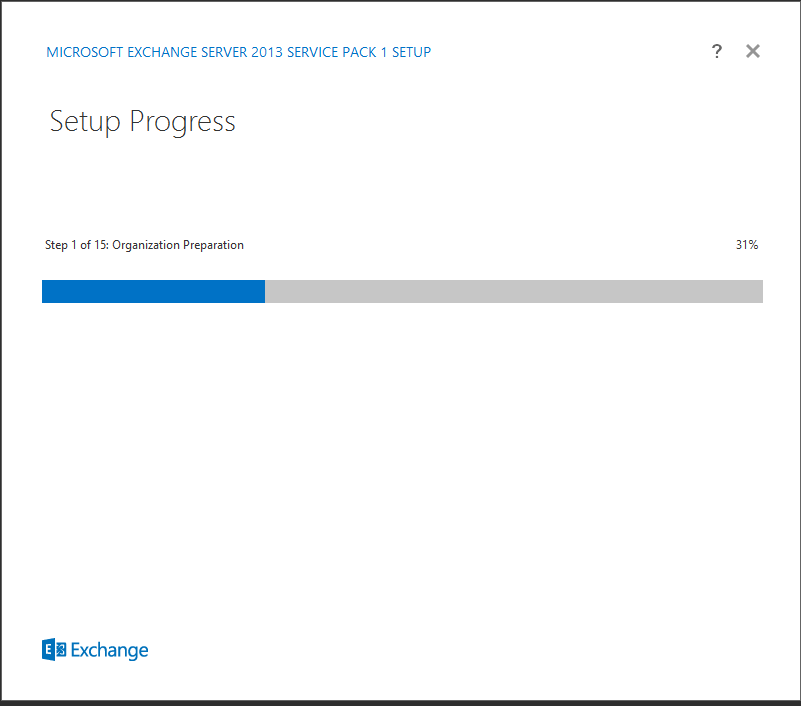
17) Installation has started and it may take up to 45 min to finish the installation.
18) Once the installation is finished, will open the ECP and add few email accounts to test the email server.
You can create Receive connectors in the Transport service on Mailbox servers, the Front End Transport service on Mailbox servers, and on Edge Transport servers. By default, the Receive connectors that are required for inbound mail flow are created automatically when you install an Exchange 2016 Mailbox server, and when you subscribe an Edge Transport server to your Exchange organization.
Until you create a Send connector, mail can't flow from your Exchange to the Internet.
The first thing is that the Exchange Management Console is gone, however we still have Exchange Toolbox and that GUI has some of the tools that we have been using for ages such as Remote Connectivity Analyzer and Queue Viewer.


It will load the ECP on internet Explorer or on your default Browser
Click continue as it is warning for Certificate. On the next blog i ll explain how to create self signed certificate and avoid this Warring

Now that i can see my ECP is loaded, will go create new mail accounts.

19) Now we will create some email accounts, we can create email accounts in two ways , We can create new user account on the AD under users and add them on exchange as existing users. Or else we can create new user on exchange and that will create the use account under the AD users.

Creating existing user

So i have created two mail account. will test the account by sending mails

To send and receive mails i will use the Outlook Web Access (OWA) in this case, Later on i ll show how we can do it on a mail client.
to go to OWA , you can use the following URL. if you try on your exchange then use https://localhost/owa
if you use another machine then type your FQDN or use your CNAME ,
Eg ; win2k12mail.student.edu.au/owa or mail.student.edu.au/owa (mail is a CNAME for win2k12mail.)

Login to OWA and send mail. here we go bingo its working

That is all, my mail server is working well... Will configure this on Thunderbird and see how does it work..
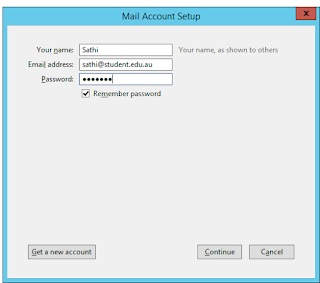
Download and install Thunderbird from the website and configure
https://www.mozilla.org/en-US/thunderbird/
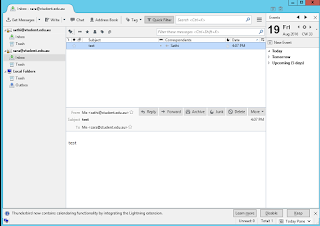
Add the account
Once the account is added we can see the mail that we send from Sathi to Sara will be there in the inbox.
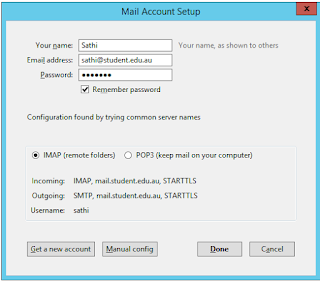
So Thunderbird found the account and the mail server. Click Done, it will ask to confirm the certificate, Click confirm.

Add the second account also... Now all is done.....
see the next post to configure self-signed Digital certificate....
https://faceitnet.blogspot.com.au/2016/08/how-to-configure-and-install-self.html
Thanks
Saththiyan
Download and install Thunderbird from the website and configure
https://www.mozilla.org/en-US/thunderbird/
Add the account

Once the account is added we can see the mail that we send from Sathi to Sara will be there in the inbox.
So Thunderbird found the account and the mail server. Click Done, it will ask to confirm the certificate, Click confirm.


Add the second account also... Now all is done.....

see the next post to configure self-signed Digital certificate....
https://faceitnet.blogspot.com.au/2016/08/how-to-configure-and-install-self.html
Thanks
Saththiyan

No comments:
Post a Comment