Tuesday 10 September 2019

Enable IPv6 on CISCO 2960 Switch - Packet Tracer

Subscribe to " FACEITNET " Youtube channel for more interesting videos 


Most of us have used Cisco Packet Tracer simulator to do our cisco CCNA practicals.

Packet Tracer is a free application by cisco and can be downloaded under netacad.com website
( Click the blow link ). Recently cisco has supported Packet Tracer to Mac computers too.

https://www.netacad.com/courses/packet-tracer

But we all knew we are moving to IPv6 world and hence we need to run the IPv6 most of the time.

Unfortunately, packet Tracer doesn't support IPv6 on Switch by default. I am going to do the step-by-step configuration to enable IPv6 on CISCO 2960 switch.

Let's do it.

First of all we need to setup a small network to upgrader the IOS version, We need IOS version 150-2 to enable IPv6

we need a switch and a server to do this upgrade.


Assign IPs to both server and switch ( int vlan 1)

TFTP server : 192.168.1.1
Switch : 192.168.1.2

once the IPs are assigned we must be able to ping each other. 

Then make sure the server has got TFTP and it has IOS version 15 as well. 


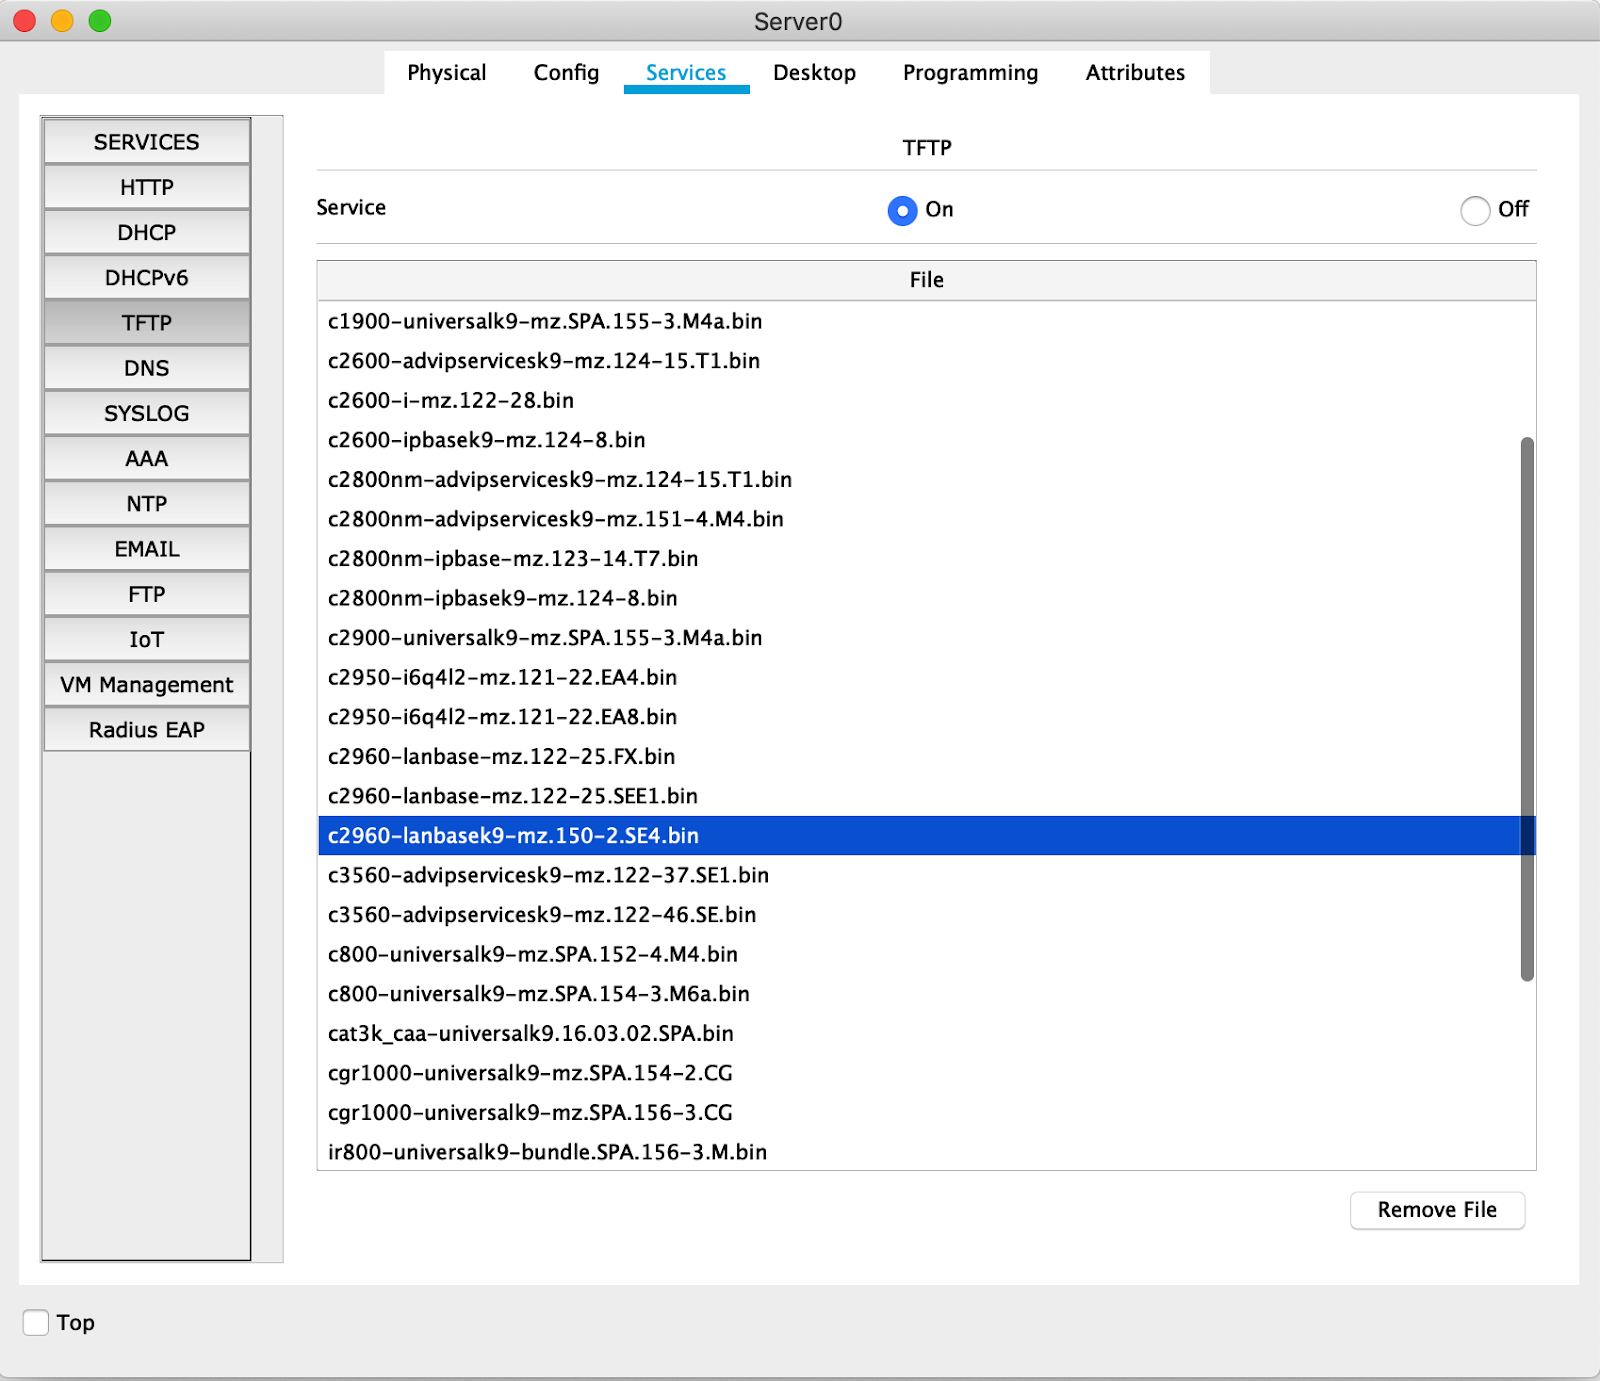
Now lets go ahead and start the upgrade

in switch enter the following commands.

Switch#copy tftp: flash: 

Address or name of remote host []? 192.168.1.1

Source filename []? c2960-lanbasek9-mz.150-2.SE4.bin

Destination filename [c2960-lanbasek9-mz.150-2.SE4.bin]?

once you confirmed you will see the following 
Accessing tftp://192.168.1.1/c2960-lanbasek9-mz.150-2.SE4.bin...
Loading c2960-lanbasek9-mz.150-2.SE4.bin from 192.168.1.1: !!!!!!!!!!!!!!!!!!!!!!!!!!!!!!!!!!!!!!!!!!!!!!!!!!!!!!!!!!!!!!!!!!!!!!!!!!!!!!!!!!!!!

[OK - 4670455 bytes] 4670455 bytes copied in 0.199 secs (1886872 bytes/sec)

Alright now we have got the 150-2 version ios file to flash drive.

reload the switch and change the boot file using the following command

Switch(config)#boot system c2960-lanbasek9-mz.150-2.SE4.bin

Again reload the device to load 150.2 ios image.

Now you could see

Loading "flash:/c2960-lanbasek9-mz.150-2.SE4.bin"... ##############################

This means the device is now loading the IOS version 15.

once its done with booting we need to enable the IPv6 Dual-stack configuration in the switch
use the following command to enable the dual-stack configuration

Switch(config)#sdm prefer dual-ipv4-and-ipv6 default

That's all we are done and we should be able to use the IPv6 configuration now, this will take place once we reload the device

so reload one more time, we can see the IPv6 commands enabled.


Thanks,

Monday 8 July 2019

Create Email Distribution List in office 365 and add users to the group

In this document I am going to show how we can create an email distribution list in Office 365 cloud ( Cloud exchange) and add users in to the distribution list. 

Distribution list is a handy way to get a group email to an In e-mail applications, a distribution list is a group of mail recipients that is addressed as a single recipient. Distribution lists are used to send e-mail to groups of people without having to enter each recipient's individual address. A distribution list is different from an e-mail list in that members cannot reply to the distribution list's name to send messages to everyone else in the group. 

But in Exchange cloud has an option to sent email to distribution list from out side the group as well. 

Lets see how we can create it. 

First of all login to you office portal @ https://admin.microsoft.com/

Then go to your admin page and click Groups 


Click + Add a Group 


Click Type and select Distribution list.


Give the name of your distribution list and email address. You can notice at the bottom it says Allow people outside of my organisation to send email to this distribution list.

Should you wish to receive mail click this and make it on. 

Thats all we have now created a distribution list and it will take some time to appear in your group list. 


Once the list is in the groups we will go and add users to our distribution list. 

In exchange we can't add users from external domain to distribution list, so the option for us to do this is, Create the external users as contact in the exchange contact and then we can add them to the distribution list. 

Create Contact in Exchange server 


Create new contact 


Now go back to Groups and click the newly created Distribution list and add the users under the members 


Click Edit and search the newly created contact and add them all in to the group. 

Thats all , we are now ready to receive email to the listed users using distribution list. 

Thanks 

Wednesday 29 May 2019

Setup Remote Desktop Services in Windows Server 2012 R2

Setup Remote Desktop Services in Windows Server 2012 R2


RDS allows you to remove the repetitiveness of configuring and managing multiple PCs in multiple location.  In one way you can think of a RDS solution for your business as a multi-user “PC”. This means, you will be able to access your desktop from home or any branch office or on the go because you can access securely through Internet.


Let see how to install and setup RDS server in Win 2012R2


Installing RDS Roles


RDS have three core roles. we can installs and run on a single server or separate each role onto its own server.
For small environment we can run RDS all-in-one setup, this would save you hardware resources. 
If your environment is large you will have to run the roles in spread servers. 

To start open Server Manager then click Manager -> Add Roles and Features

1 Remote Desktop Service - Add Role and Feature

On the next screen you will need to select 


Change the selection to Remote Desktop Services Installation then click Next


Click Quick Start setup you can add additional servers to each role to allow expansion


Change selection to Session-based desktop deployment and click Next


Connection Broker, Web Access and Session Host roles will be installed on the single server. Click Next


Restart the destination server automatically if required


Once finished click Close. Remote Desktop Services is now installed!


Http vs Https